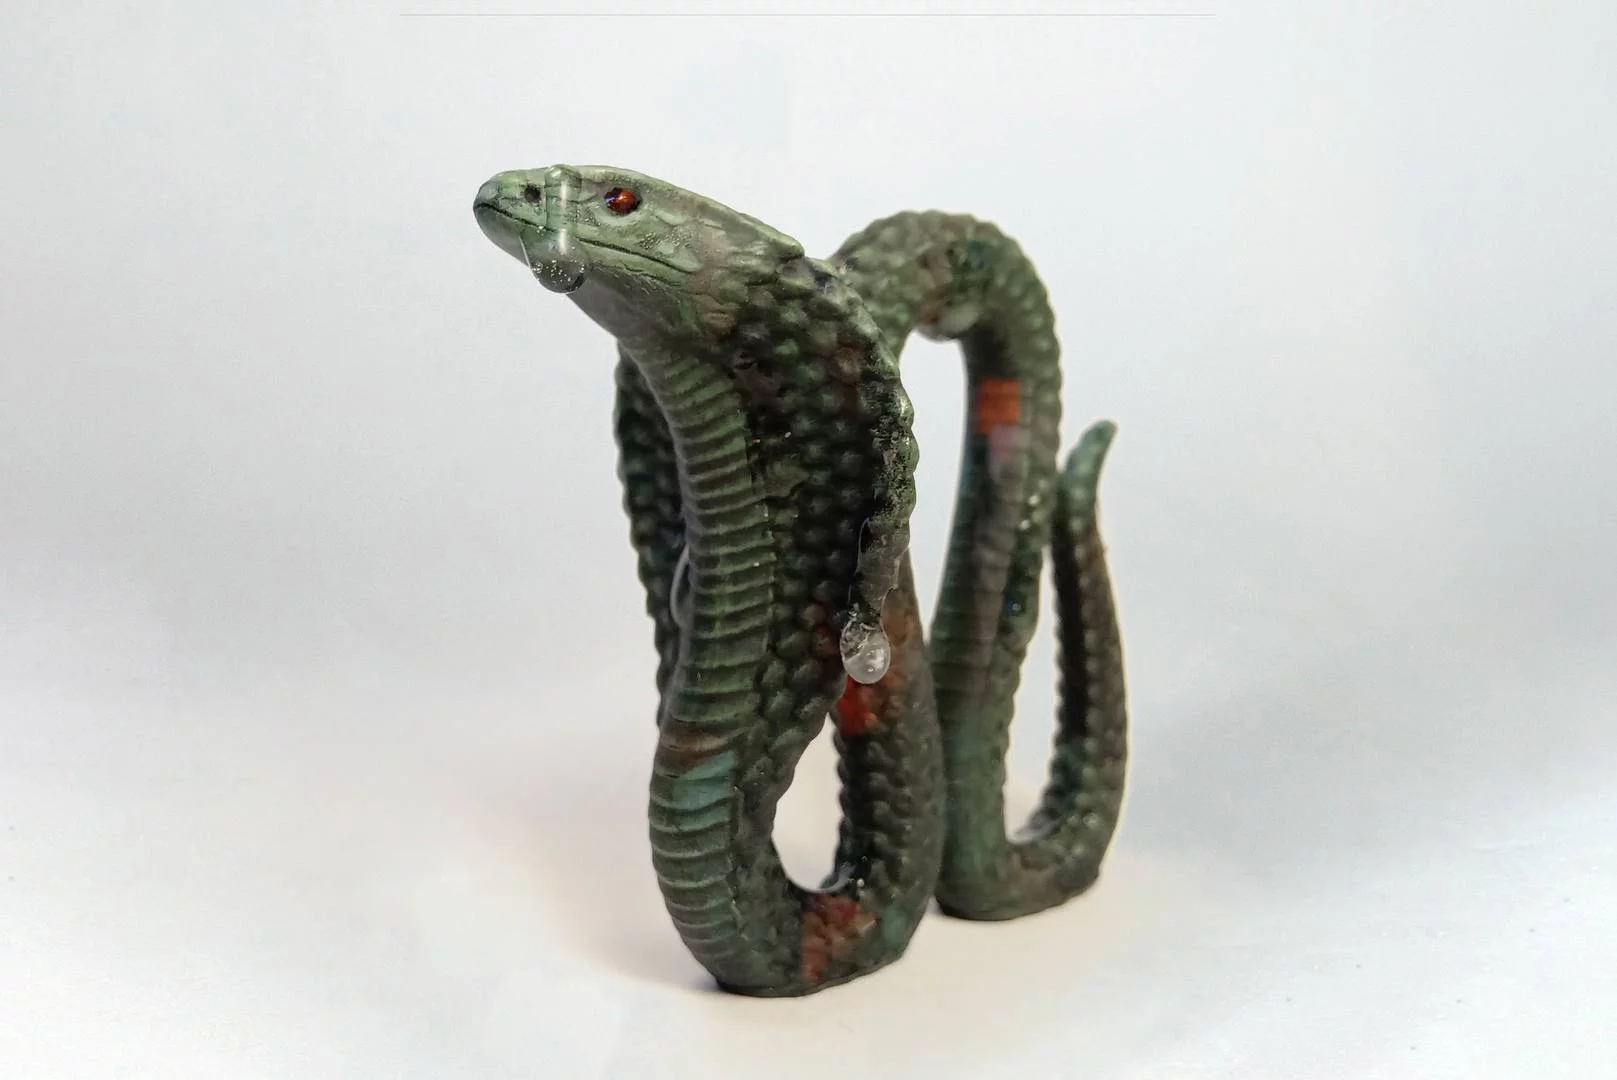

Prime your snake with black primer. I used Xpress Base Black. Make sure to have an even opaque coat of paint, especially if you are printing with translucent resins.

With red paint (here Pure Red from Army Painter), draw some stains all over the body of the snake. Do not overdo it, as we will use two other colors to do other stains in the next steps. Be not afraid of the vibrancy of the colors, it will be toned down.

With blue paint (here Viking Blue from Army Painter), draw some stains all over the body of the snake. They can overlap with the red stains to add more dimension to the piece. Do not overdo it, as we will use another colors to do other stains in the next steps.

With purple paint (here Genestealer Purple from Citadel), draw some stains all over the body of the snake. They can overlap with the red and blue stains to add more dimension to the piece.

Coat the snake in a diluted black paint (here Matt Black from Army Painter). We are doing this to tone down the colors. You can do it until you are satisfied.

To drybrush this snake, you will need an old paintbrush with moderately soft bristles.
To give it a chalky look, do not wet the brush, if you do not want a chalky effect, wet your brush and then wipe it off a bit on a textured plate. You can do so on a paper towel too, but as paper towels absorb a lot of water, be careful to keep your brush slightly damp.
Take a bit of paint with your brush, and wipe it on a paper towel (for a chalky look) or on a textured plate (for a non chalky finish) until there is barely any paint coming off the brush.
Gently brush the snake with your brush, drybrushing is all about picking out the textures of the model. The direction in which the brush is going is very important for some effects!

We will be emulating the way sun hits a stone texture. Mix black and white paints to get a mid-gray color (here the white is Matt White from Army Painter). Drybrush the whole snake. Be careful to only move your brush in a top to bottom movement, no side strokes or, even worse, no bottom to top movement!

Add a bit of white to your previous gray, and drybrush it on the head, to to bottom, but also from the snout to the back of the head. Do it also on the back part and the end of the tail, all in a top to bottom movement.

With a pure white, drybrush slightly the head in a snout to back movement.

We will be giving the snake a green filter, for a more ‘eldritch’ look. With a diluted mix of green and black (here Goblin Green from Army Painter) paint your whole snake.

For the detailing and placement of the highlights I will use a 000 brush.

Highlights 1 – Now we will be taking out the details of the snakes head with pure green.

With a mix of black and red, paint the eyes.

With pure red, paint the top half of the eyes, following the curve of them.

Highlights 2 – Add a bit of black and white to the green to make it lighter, but also desaturated, and pick out the details in smaller areas than in the previous detailing step.

With black paint and a fine detail brush, go in all the recesses of the snake (on the head and on the front belly part) to give the statuette more depth.

Highlights 3 – Add a bit of white to your previous highlight color and take out the details over the eyes and around the mouth.

Highlights 4 – With pure white, take out the details over the eyes and the mouth

Varnish your piece with mat varnish (here brush on Anti-Shine Matt Varnish from Army Painter)

This is an optional step : we will give the piece a wet look.
With either water effects or UV resin draw droplets on the snake. Water effects take longer to dry but give a more natural look to pieces as it flows more, especially in areas where water would pool. UV resin is faster to apply, but is thicker and destroys the brush you are using.
If you are using UV resin, I suggest you use a needle or another small tool to apply the resin.
