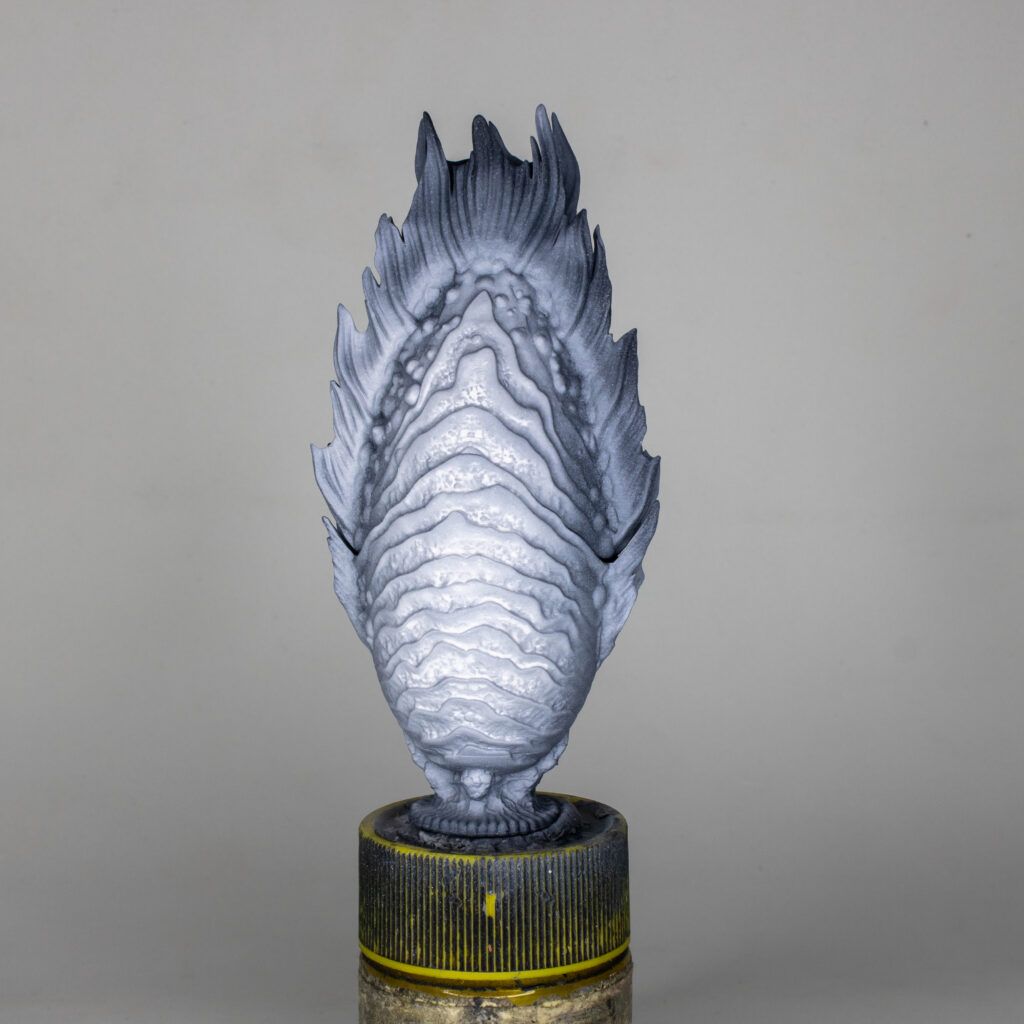
I started with a double primer, black first so it sticks well to the model and then oversprayed white to give a bright base to work with, as I only used contrast paints for this model.
All the color work was made using an airbrush.
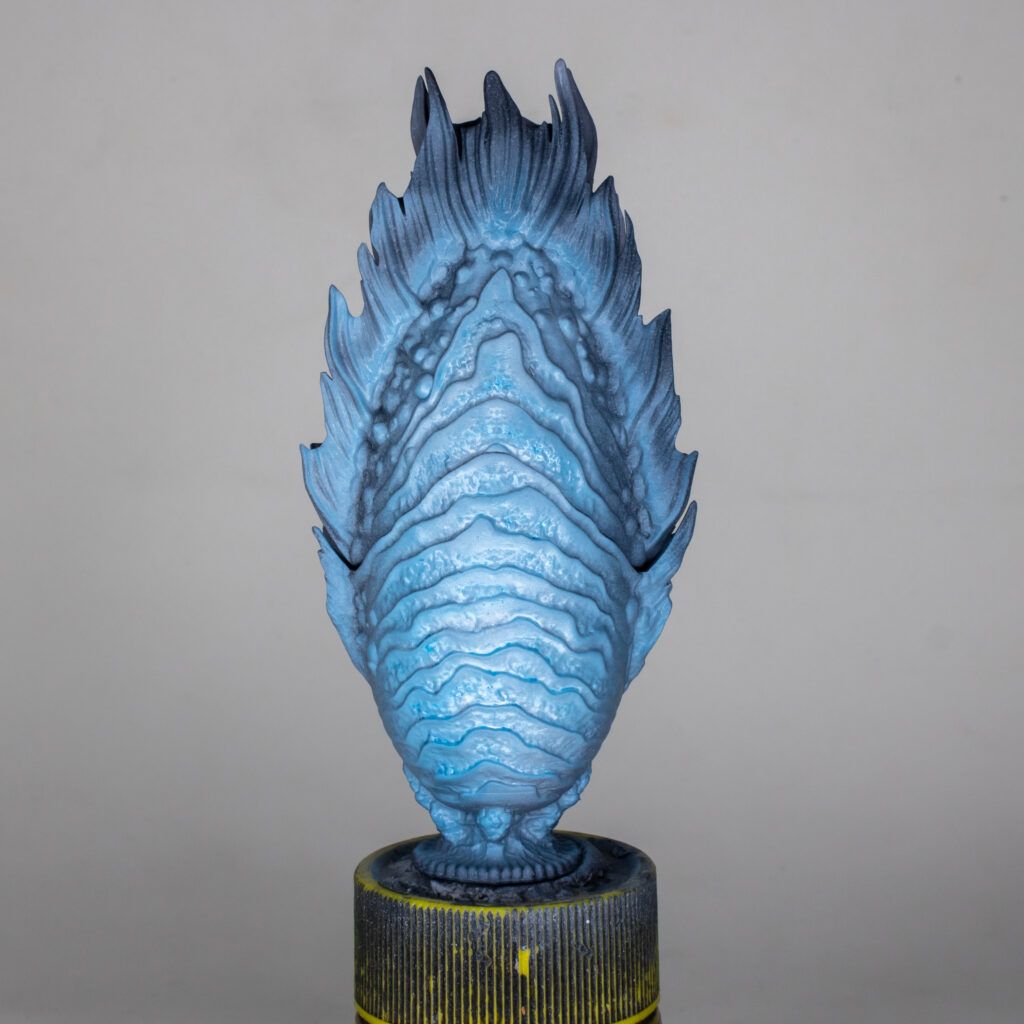
For the first layer I used a very diluted mix of Stormfiend with a little bit of white ink to raise the value a bit. Any bright blue will work though. I covered most of the egg and left just the top part of the “tail” area unpainted.
The paint/thinner proportion I used was around 1:10 as contrast are very highly pigmented paints.
As Contrast Paints are quite transparent, but with high pigmentation, it’s very easy to tint areas primed with white, while keeping the volume of the sculpt without flattening the surface. Using regular paints will mostly cover everything evenly.
The use of airbrush is recommended because it’s much easier to control the pooling in the areas you don’t want it to accumulate, so it will only pool if you want it to.
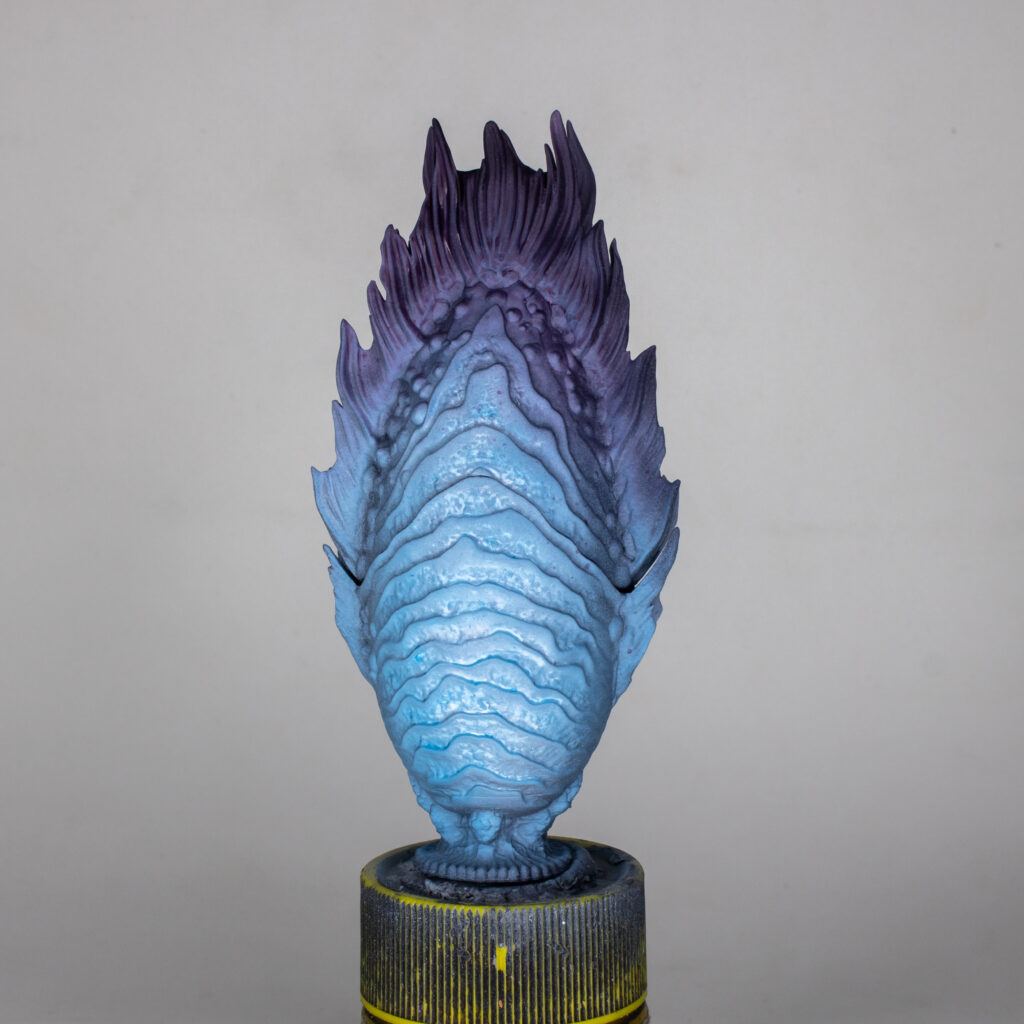
For the darkest area of the tail I used a mix of Dreadful Visage with a little bit Volupous Pink to move it to a slightly more purpleish tone. I didn’t dilute this mix because Dreadful Visage has very little coverage and pigmentation.
I let it pool in the reccesses to give more depth and saturation in those parts. No need for thin layers here.

For the lower part of the tail parts, I used Terradon Turquoise. Again, in a 1:10 proportion. I sprayed from underneath to reach all the parts and the sides of the egg.
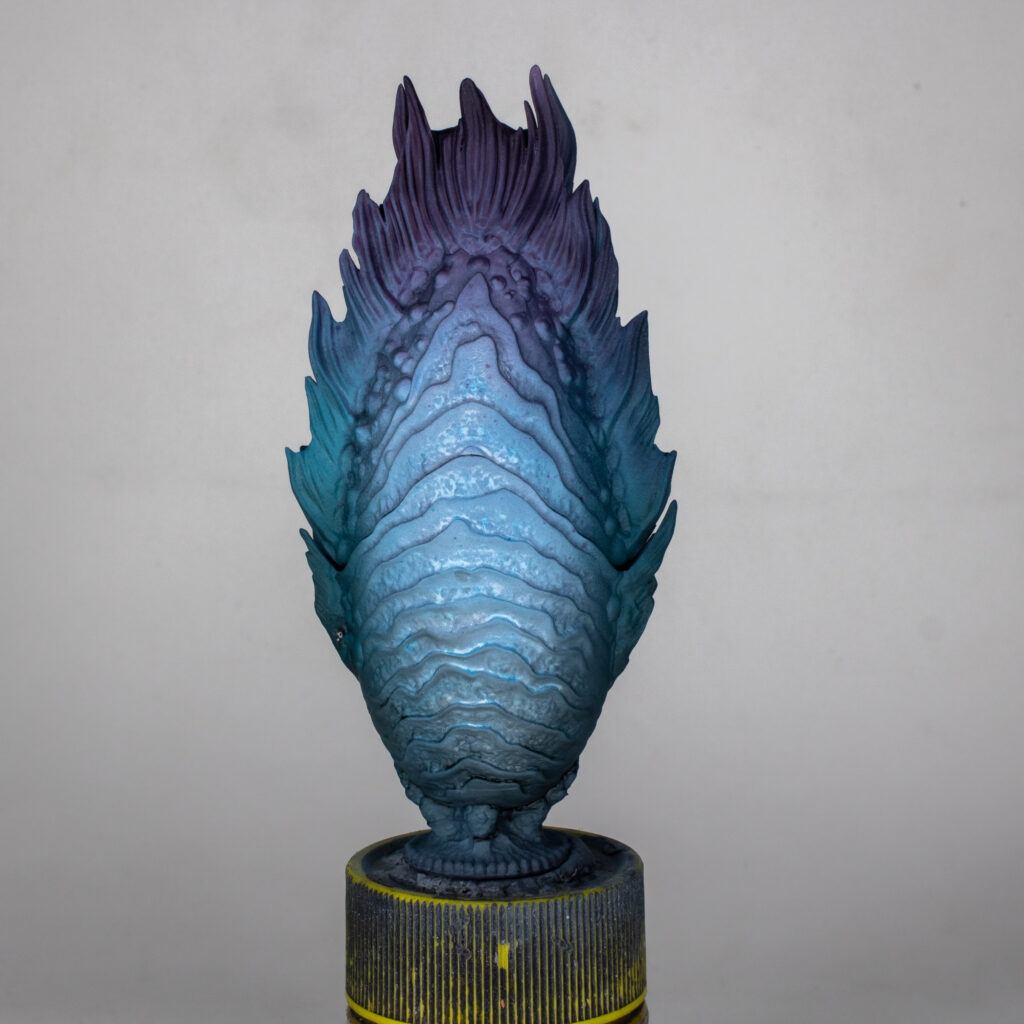
Then with Black Templar added to the Terradon Turquoise to get a very dark, almost black-blue, I sprayed from the bottom to dull that area a bit and give it a shadowy look.
After this I varnished the whole model with Ultra Matt from AK for the next step.
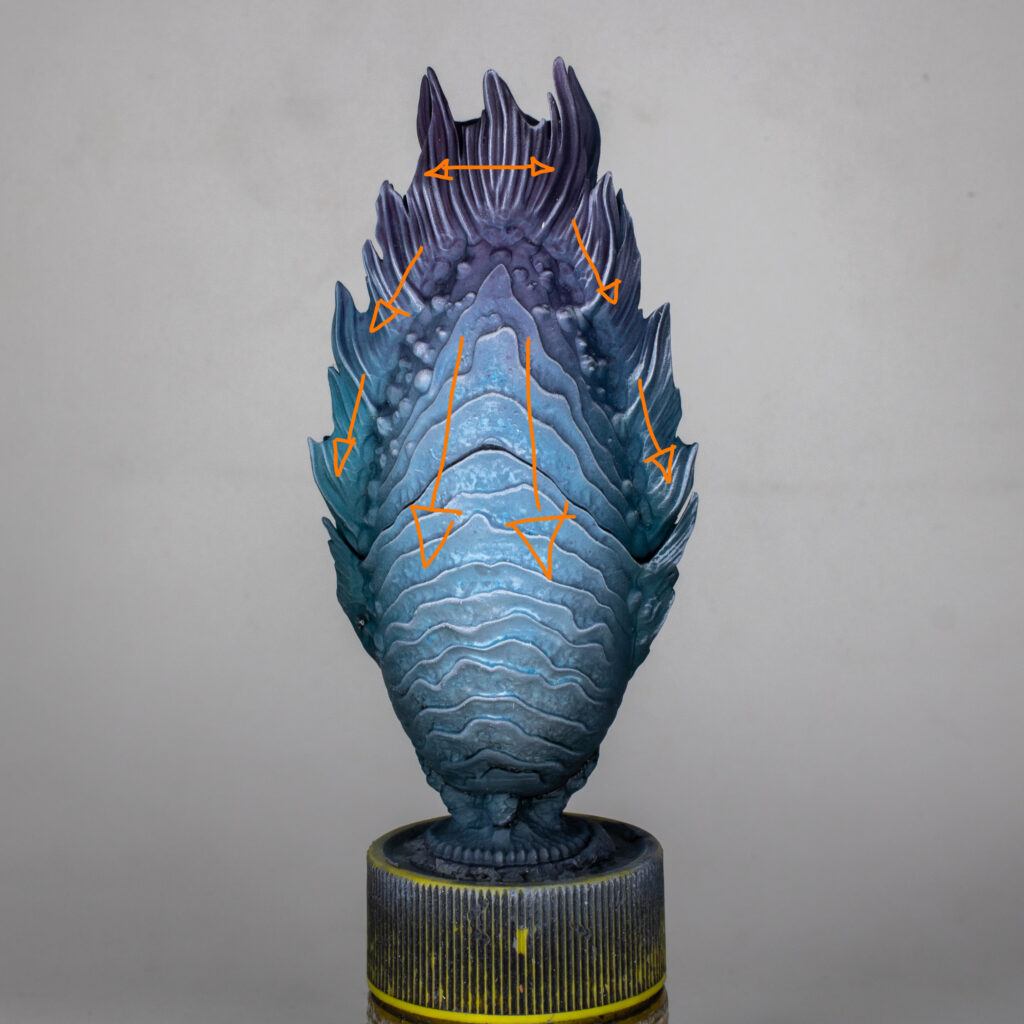
Next step – drybrushing.
That’s why I varnished in a matt finish, so the paint has a rough surface to stick to.
I used pure white with a big round brush in the direction of the arrows, so the white only catches on the raised areas and doesn’t get in the deep reccesess, where there is more color and saturation.
The idea behind this white drybrush is to get a much brighter look in the following step.
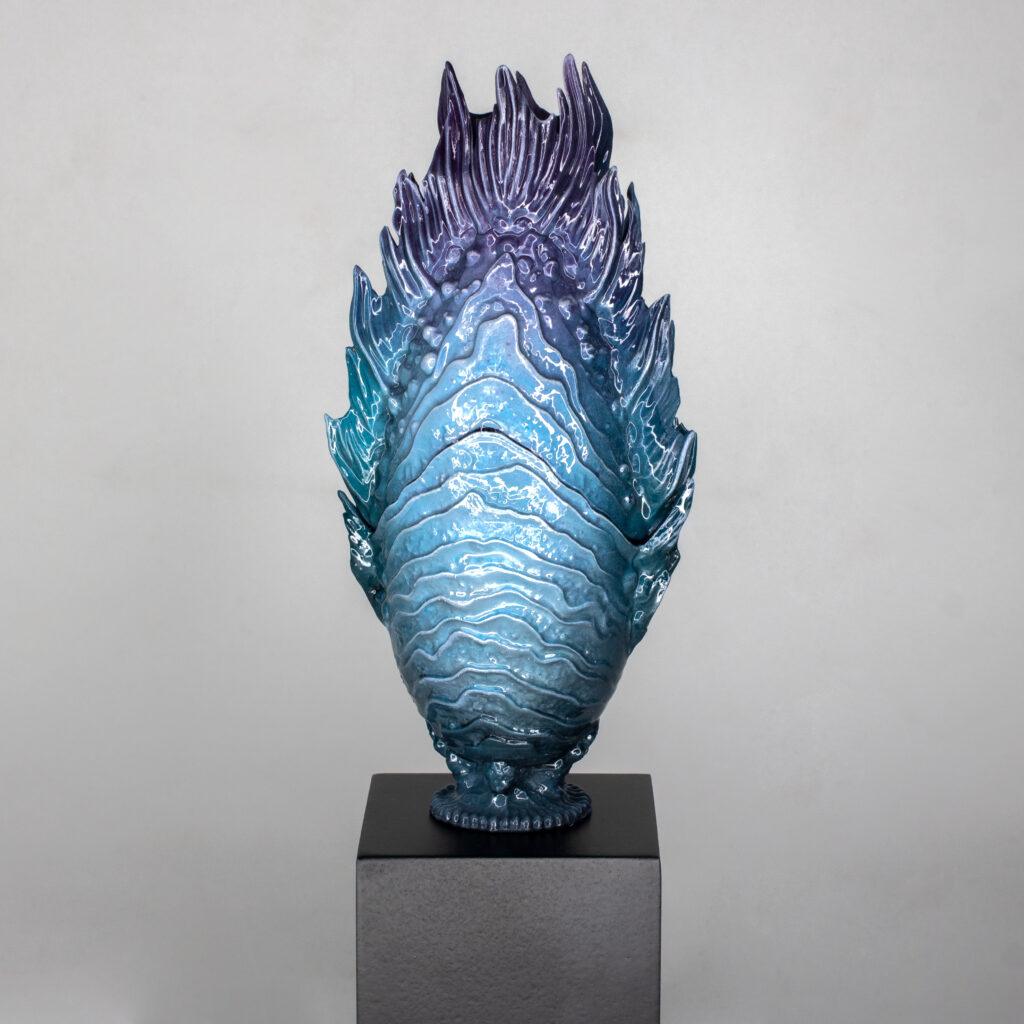
All that’s left is give it a shiny, watery look and to achieve this I used a high quality ceramic varnish.
WARNING: Some ceramic varnishes require heat to cure them, if the layers are too thick. Be extra careful with the brand you choose. Ask the manufacturer first.
There’s plenty of products to simulate this that will yield similar results.
Two component epoxy resins for jewelry.
Water gel effects from AK or AMMO.
Ceramic varnishes used in crafts and art.
High quality synthetic varnishes.
The only requisite is that it gives an extremely wet look when it dries and doesn’t get dull as most gloss varnishes do.